Setting up the RE6250 (AC750) wireless range extender is fast and easy because of its CD-less and effortless setup. You can easily run the Linksys extender setup process from an internet browser even if your device (computer or laptop) does not initially have an active internet connection and is on factory default settings. The easy steps given below will guide you on how to set up your Linksys RE6250 in a hassle-free manner.
Linksys RE6250 Setup: Manual Method
Step 1:
- Plug your Linksys RE6250 (AC750) wireless range extender into a power outlet.
- Wait for the LED on it to become orange.
Step 2:
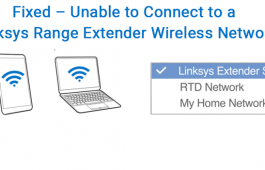
- Now, connect to your home SSID (network name) using a mobile device, computer, or laptop.
- During the initial setup process, ensure that you have a strong, live, and active internet/WiFi connection coming out of your main router.
Step 3:
Once you are connected to the default SSID of your WiFi range extender, open a web browser from the same connected device and type 192.168.1.1 into the browser’s address/URL bar field.
Step 4:
- Ensure that you read and agree to the ‘End User Licence Agreement’.
- Once done, please click on the ‘Start Setup’ button.
Step 5:
Select your SSID (wireless network name) when prompted.
Step 6:
Type in your security key/passkey or network password/passcode.
Step 7:
After that, an _EXT will be added to your SSID automatically. If you would wish to set the security mode, password, and SSID of your WiFi range extender’s 2.4 and 5GHz band, fill them into the provided fields. Else, click on ‘Next’.
Spot Finder page will display
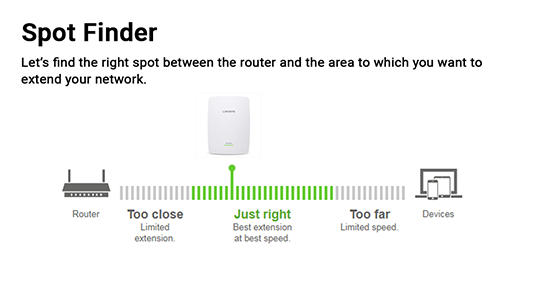
Step 8:
- The ‘spot finder’ feature will determine the WiFi signal strength between your existing WiFi router and the Linksys range extender.
- Hit the ‘Find better location’ button in case your Linksys extender is placed too close or too far from your main WiFi router.
- Once done, follow the on-screen instructions carefully.
As soon as you have found the perfect spot to place your extender, click on the ‘Back’ link and proceed further.
Step 9:
- Enter your valid Email address.
- Register your Linksys device.
- If your device is already registered, then skip this step and proceed further.
Step 10:
- Create an admin password.
- Enter the admin password again.
- Add a password hint as well.
- Hit the ‘Save’ button once done.
Step 11:
Now, your Linksys WiFi range extender will go through a firmware update checkup automatically. In case the new firmware is available to update, it will proceed forward. And if the new firmware is not available, it will proceed with the next step.
Step 12:
As soon as the button labeled ‘Next’ turns blue, please click on it.
You have now set up your Linksys RE6250 (AC750) WiFi range extender successfully without any issue. You can write down the settings or hit the ‘Print’ button and keep it in your file safely.
Linksys RE6250 (AC750) Setup: WPS Method
Step 1: Plug the Linksys RE6250 (AC750) into a power outlet. The plug should be closer to your main WiFi router.
Step 2: Now, hit the WPS button of your main wireless router or the gateway.
Step 3: After a few minutes, hit the WPS button of your Linksys RE6250 (AC750) extender as well. The indicator light on the front panel of your device i.e. the range extender will start blinking.
Step 4: Wait for some time and let the front indicator light become solid green. This will indicate that the connection you have made is successful.
Important Note: If you like to extend the 5 GHz network, then please repeat the Steps 2-4.
Congratulations! You have successfully set up your Linksys RE6250 (AC750) WiFi range extender using the WPS method. If you still can’t setup your AC750 RE6250 extender, reach out to our experts immediately via email.
Tags
Posts You might like


Disclaimer: Linksyssmartwifi.site is an information provider. It is not affiliated with any third-party brand or manufacturer. Linksyssmartwifi.site provides information on troubleshooting issues related to various extenders, routers and similar networking devices. Our services are provided only on demand to users.