Getting confused amidst the process of connecting a WiFi extender to a Starlink router/gateway has become a common thing. Well, the process isn’t that complicated if steps are carried out carefully. To add some more carefulness to the process, we have penned down this blog. Here, you will get complete instructions on how to connect WiFi extender to Starlink router. For easy understanding of the concept, we are discussing the steps to do Linksys WiFi extender setup and connection with the Starlink gateway. Shall we start now?
What You’ll Need to Connect WiFi Extender to Starlink Router?
The process of connecting a Linksys range extender to a WiFi router from Starlink will require a few things and details that we’ve mentioned below:
1. An Ethernet Cable
It will be required at the initial stage of the connection process. The reason being, using a wired connection at the primary stage ensures that the connection is stable. However, you are suggested to choose a damage-free cable for this purpose.
2. A Web Browser
The entire process to connect WiFi extender to Starlink router will be carried out via the web-based management utility of the Linksys extender. Thus, the necessity of a web browser is there. Just ensure that the chosen one is updated and free of cache.
3. The Default Details of Linksys Extender
You will also need the default details (SSID, and WiFi password) of your Linksys extender in order to connect it to the Starlink router. However, this will be a sub-step as you will use the SSID and WiFi password to connect PC to the extender’s network. You will also need the default Linksys extender login password during the process.
4. SSID and Password of Starlink Router
The most important element required in order to connect the WiFi extender and the Starlink router is the latter’s SSID and WiFi password. Otherwise, how will the extender be able to understand that it has to extend the signals emitted by the Starlink router?
How to Connect WiFi Extender to Starlink Router [Steps]
In the previous section, we revealed some basic requirements of the connection process. This section will purely focus on the steps that must be used to connect the Linksys WiFi extender and the Starlink router:
- Keep your Starlink router/gateway and the Linksys extender in the same room.
- Using the chosen Ethernet cable, join the LAN port of the Starlink to the Internet port of the Linksys WiFi range extender.
- The next step is to switch on the router and then the range extender.
- Connect your WiFi-enabled computer to the Linksys extender network.
- You can also use an Ethernet cable to connect extender and the PC.
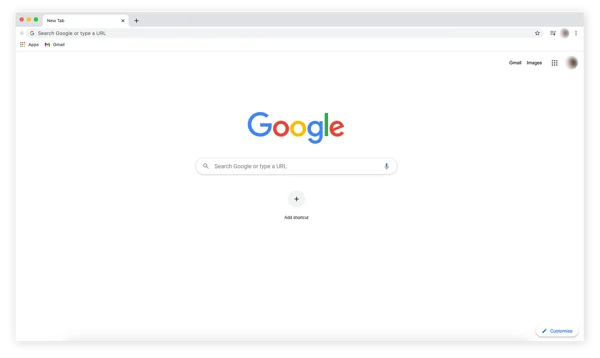
- Open a web browser now.
- Type the extender.linksys.com URL.
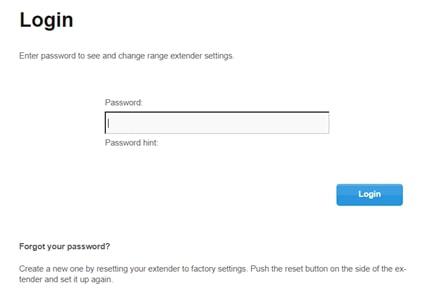
- You’ll find yourself on the Linksys extender admin portal.
- Enter admin into the provided space and select Login.
- You are now suggested to accept the terms and conditions and select Launch Setup.
- A window will appear where all the WiFi networks present in the Linksys extender’s signal range will appear.
- Choose the network name or SSID that belongs to your Starlink gateway.
- Enter the respective WiFi password.
- The next screen will ask you to set a new administrative password for the range extender.
- Set new SSID and password for both frequency bands of your Linksys device.
- Your PC will experience disconnection with the extender.
- Reconnect your PC and the extender using the upgraded WiFi details.
- Once done, return to the web-based management panel of the range extender using the newly assigned admin password.
- The wizard will check if a Linksys extender firmware update is available.
- In case the extender needs to be updated, install the latest version of the firmware.
- Wait for some time and let the extender reboot.
- You will be presented with a page showing all the details of your WiFi extender and its network.
- The connection is now successful!
In this manner, you can connect WiFi extender to Starlink router using an Ethernet cable, updated web browser, default Linksys extender details, and the SSID and password of the router. Know that you need to relocate your extender after connecting it to the router. It means, the Ethernet cable can be detached now. You are now all set to place your extender to get rid of internet dead zones.
Know that you will have to keep the extender in an interference-free zone. Otherwise, WiFi connection issue will arise and you won’t be able to access the internet easily. To be very specific, you should place the extender away from metal objects, reflexive surfaces, and heavy electrical appliances.
In Conclusion
You will surely find it easy to connect WiFi extender to Starlink router if you are aware of the correct steps along with the prerequisites. Now, we hope that you will be able to connect your devices without any hassle. So, enjoy the extended network now!
Tags
Posts You might like
Disclaimer: Linksyssmartwifi.site is an information provider. It is not affiliated with any third-party brand or manufacturer. Linksyssmartwifi.site provides information on troubleshooting issues related to various extenders, routers and similar networking devices. Our services are provided only on demand to users.